

M3A1 Half track from Modelik is my next card build, in 1:25 scale. Kit and laser cut tracks were sponsored by the manufacturer. By the first glance the model looks easy and straightforward, but has a lot of components. This issue is actually a second edition of this vehicle, first one was published many years ago, without modern design, laser cut tracks (which make life easier and assembly quicker), or array of details available, including engine and full chassis. Before starting the build, I went to the museum to see the real thing. Impreial War Museum at Duxford, Tank Museum Bovington had one and a mobile artillery carrier version T - 48 (Su - 57) was found in Army Museum in Warsaw. All 3 were used as references for this build.


 The build started with chassis' frame and the engine, which is little model on its own. Engine was done mainly using parts supplied within the kit. Because from a start it was supposed to be build in "standard", what means using original colors of the kit without overall painting but the edges, the engine has not been superdetailed with additional materials which would require painting. The engine has surprisingly many parts, and after good few hours of assembly was finished.


Assembly carried on, but with next components - steering mechanism attached to left, front of frame, first problems appeared. Parts 2 & 3 are not exactly matching together, white spaces were not flushing, diagrams and instructions did not explain how to fit them together, so it was left till later, after engine fitting and steering column could be added. It turned out problematic as well, as the axle of steering column (part 5) was not in line with steering mechanism (parts 2 & 3)! Front bumper & cable roller were assembled.


 |
| Incorrect engine position |
 |
| Incorrect engine position, cabin will not fit correctly. |
Front bumper & the engine block were fitted to the frame, and here another puzzle appeared. How to fit the engine? Several reference photos suggested it should have been fitted under the angle, but neither from assembly diagrams nor description could have figured out how it really should have been done. At first went for leveled position against the frame. And that proved to be incorrect. Engine HAS TO BE ANGLED for part 42 to flush with frame to part 1P (instruction is saying 1L what is an error). If engine is leveled with frame as I've done at first, it will block drivers compartment to sit correctly upon the frame.

 Also found an error with rear radiator cover, part 47, and placing of fan. The hole for the fan is too far left, should have been central. That caused propellers to be shortened to fit inside. Decided to fit mesh onto the radiator itself and do front flaps open. For mesh I used jewelery bag, airbrushed Tamiya Rubber Black. Also there are two pipes going off the engine to part 47, none of them are listed as parts and mentioned in the description.
 Having engine fitted, chassis was prepared, front and rear. There are not as many wheels as in any other tank, but design of especially idler and stretching wheels is requiring. Steering wheels are easy and straightforward, no problems found there, some fiddling was required when preparing stretchers - nothing what steady had with tweezers and glue cant solve.


 Assembly of road wheels and bogies were also straightforward, but I found missing components of return rollers. 4 components 81 C, egding strips of return rollers were missing so had to prepare them myself, 5,3 mm width & 29 mm length strips did nicely. Bottom part of the bogies, 75 E had to be painted as missed color.


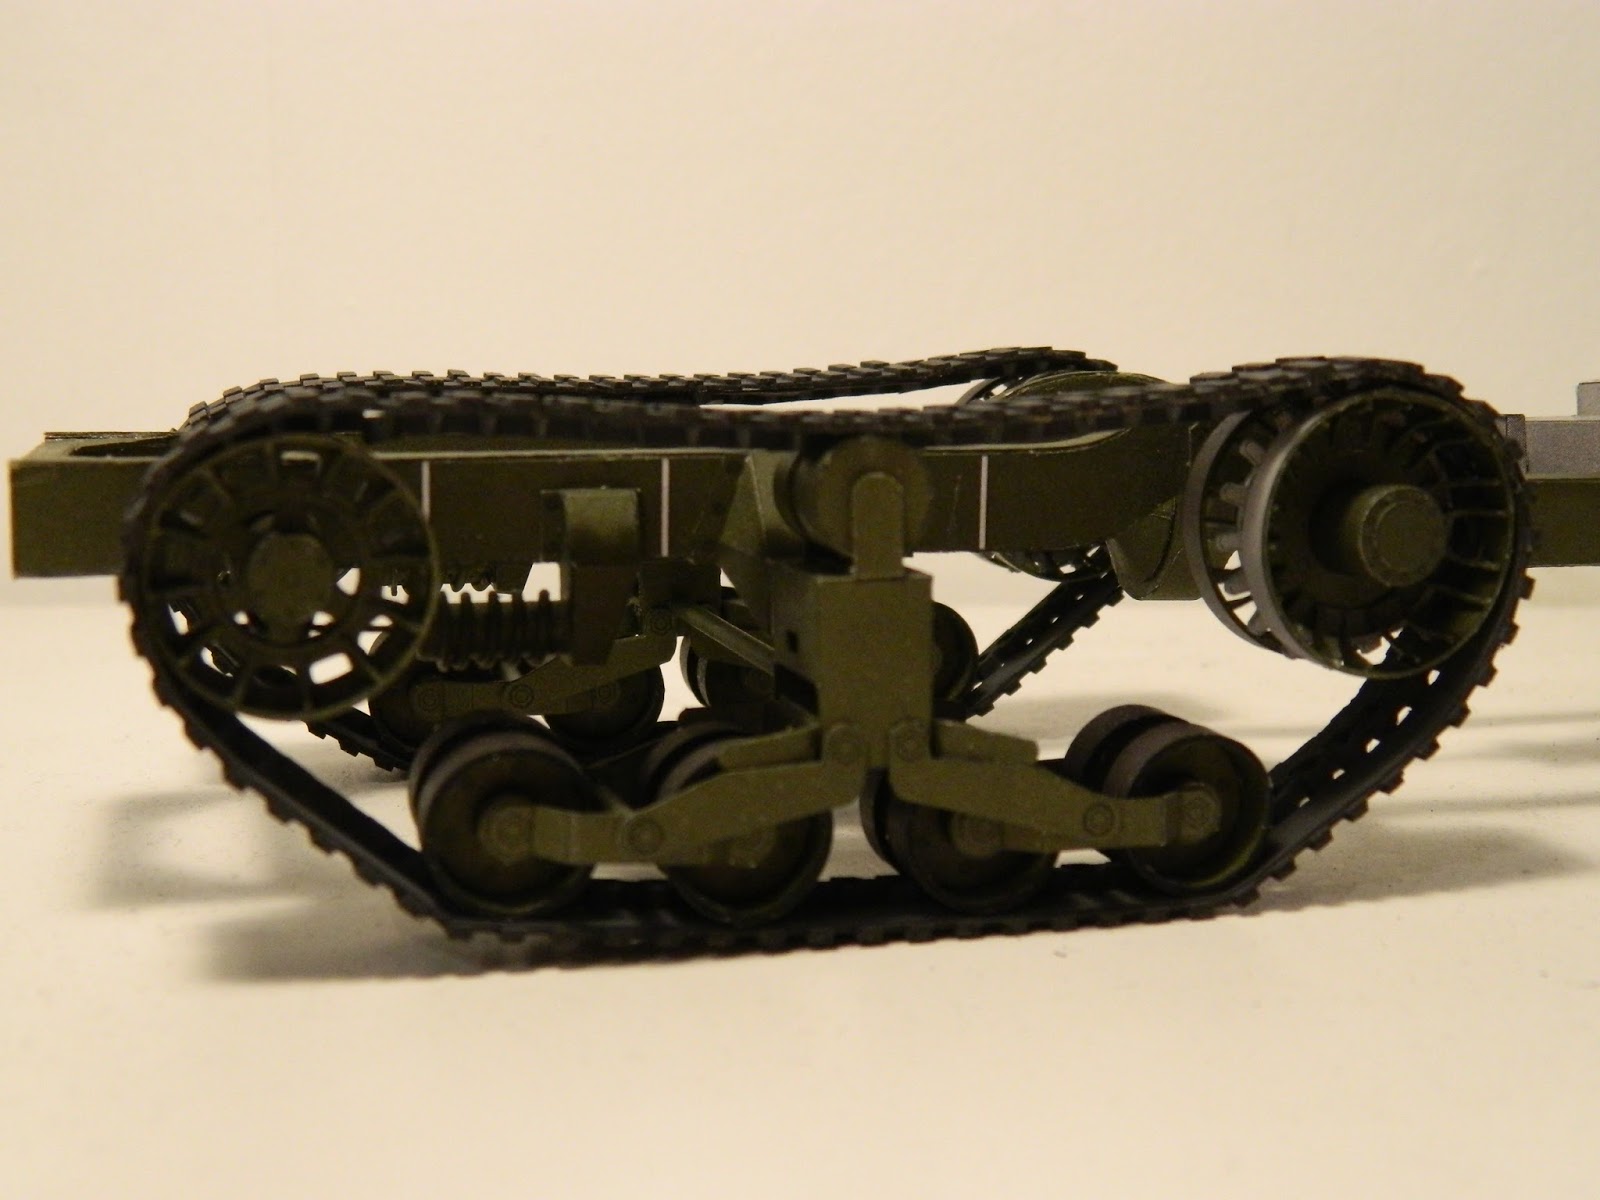
 The tracks, laser cut accessories, proved time saving. Had some trouble bending rather rigid card around the wheels, but done it in sections after gluing on all details. All ent surprisingly quickly. Tracks were airbrushed with Tamiya Rubber Black. First fitted around the wheels, measured to fit, then cut and fixed together using super glue. Also on the inside, where wheels meet the track, long strips were used what simplified "looping" and reinforced the joint.
 Majority of work was done on the chassis, when model stands on its own its usually time for the best part - upper body and details. After having problems with engine, some lacks in instructions and drawings made assembly of driers compartment difficult. Shape of the floor and engine wall was tricky and not enough information were provided of how to assemble. Also it was the moment when engine block being fixed at first at leveled position had to be replaced and fixed under an angle to accommodate drivers cabin. Battle compartment was also prepared, and before fitting on both were joined together.


 Whole body was fitted to the cahssis, and work on details started.Drivers compartment had the most - seats, steering wheel (done using wire), gear sticks (done using dressmaker pins). Nice feature was two part dash board, which has two panels, front with closks to be cut out and second one, which can be covered with thin foil to imitate glass, both fixed together give nice depth and glass cover of the clocks.

 Engine flaps and doors have been assembled along with the body. Basic version provides full panels with everything in closed position. To make it open doors have to be cut out and thickened with card etc. There are spare panels available for each door, and flap. Found them useless, as after cutting the fitting of each door was perfect. It can be used as reserve of color though. All panels were added at the very last stage of assembly to avoid any unnecessary damage. Only small details remained, gunners nest, guns, lights and tools, which had be made using wooden sticks and painted with Citadel wash or more "woody" appearance.
No comments:
Post a Comment