 The fewer details it seems the longer it takes. Engine hatches and back engine plate with all details are done. Miniature of the gun came next, it's base with characteristic "snout" ("Saukopfblende") shape is made but not yet fixed to the upper hull. Gun barrel was rolled out of kit's card, after almost hour spent rolling can say I'd rather prefer offset paper as alternative. Offset is softer, easier to control and keep in line. Card is too thick for small diameters, moreover if too much pressure is applied while rolling surface my crack or bend leaving visible marks. For rolling I use 2 mm in diameter, few inches long steel bar. Surface for this method is important, it has to be soft and flexible. I use back side of old mause pad, which is "foamy" and ideal for this kind of job. The 'slope' part of gun's base has difficult shape, had to fold it first in proper areas than stick it piece by piece to the rest. Design here did not fail, but part requires extra attention especially on the "round" corners, angle is more than 90 - 100 degrees, curved and has to be flat on joining point.


 Design of engine hatches is no different to the other ones I've made so far with exception of cut - out areas of engine grills. At first parts were thickened with applicable card then cutting done separately on the inside and outside part of each hatch to avoid struggle and millions of broken blades. Next job was filling gaps with SuperGlue and sanding to fit. After fitting hatches into the body hinges were rolled using the same method as described previously and glued in closed position. Important thing is to be cautious not to drop any SG onto working parts of hinges, for it's all very fragile and any drop of glue may cause unwanted mess or worse block the hatch. Glue - less rolling (glue applied on the end only to keep rolled strip in desired shape and diameter) is useful here as does not cause separate parts of each hinge to stick to each other.
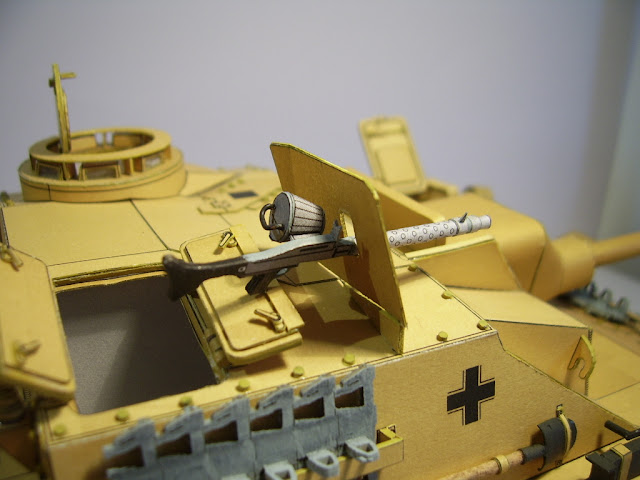
 Back engine plate has just few details, I did not find any difficulties here, everything went easily. Design of MG 34 is very simple but for standard it looks at least OK. For wood imitation I used cocktail sticks with shovel, hammer and hatchet. After basic assembly of each tool I applied wash of Gryphone Sephia (from old Citadel paint & wash range) to give more 'woody' look. Paper parts were repainted as original light gray color does not really fit here, its too bright and looks very artificial even for standard build.
Lights and other remaining details were added, rivets where necessary. Spare track lengths were placed in proper places and gun glued to the upper hull. Antennas and two spare road wheels put into side basket completed the build. I did really enjoy building this model. I have though few ideas how make it look even better (Panzer IV/70 I've got from Modelik is very similar in design).


No comments:
Post a Comment